Ghost Mannequin Product Photography: Display Your Clothing Like a Professional
In the competitive landscape of e-commerce fashion, the quality of your product images can make or break a sale. Among the most effective techniques for showcasing apparel is ghost mannequin photography—a method that creates the illusion of an invisible mannequin wearing your garments, giving them a professional, three-dimensional appearance that flat lays simply cannot achieve.
Understanding the Ghost Mannequin Effect
The ghost mannequin effect, also known as the invisible mannequin technique or hollow man effect, is a specialized product photography approach that displays clothing as if worn by an invisible model. This technique removes the physical mannequin from the final image while preserving the garment's natural shape, drape, and fit.
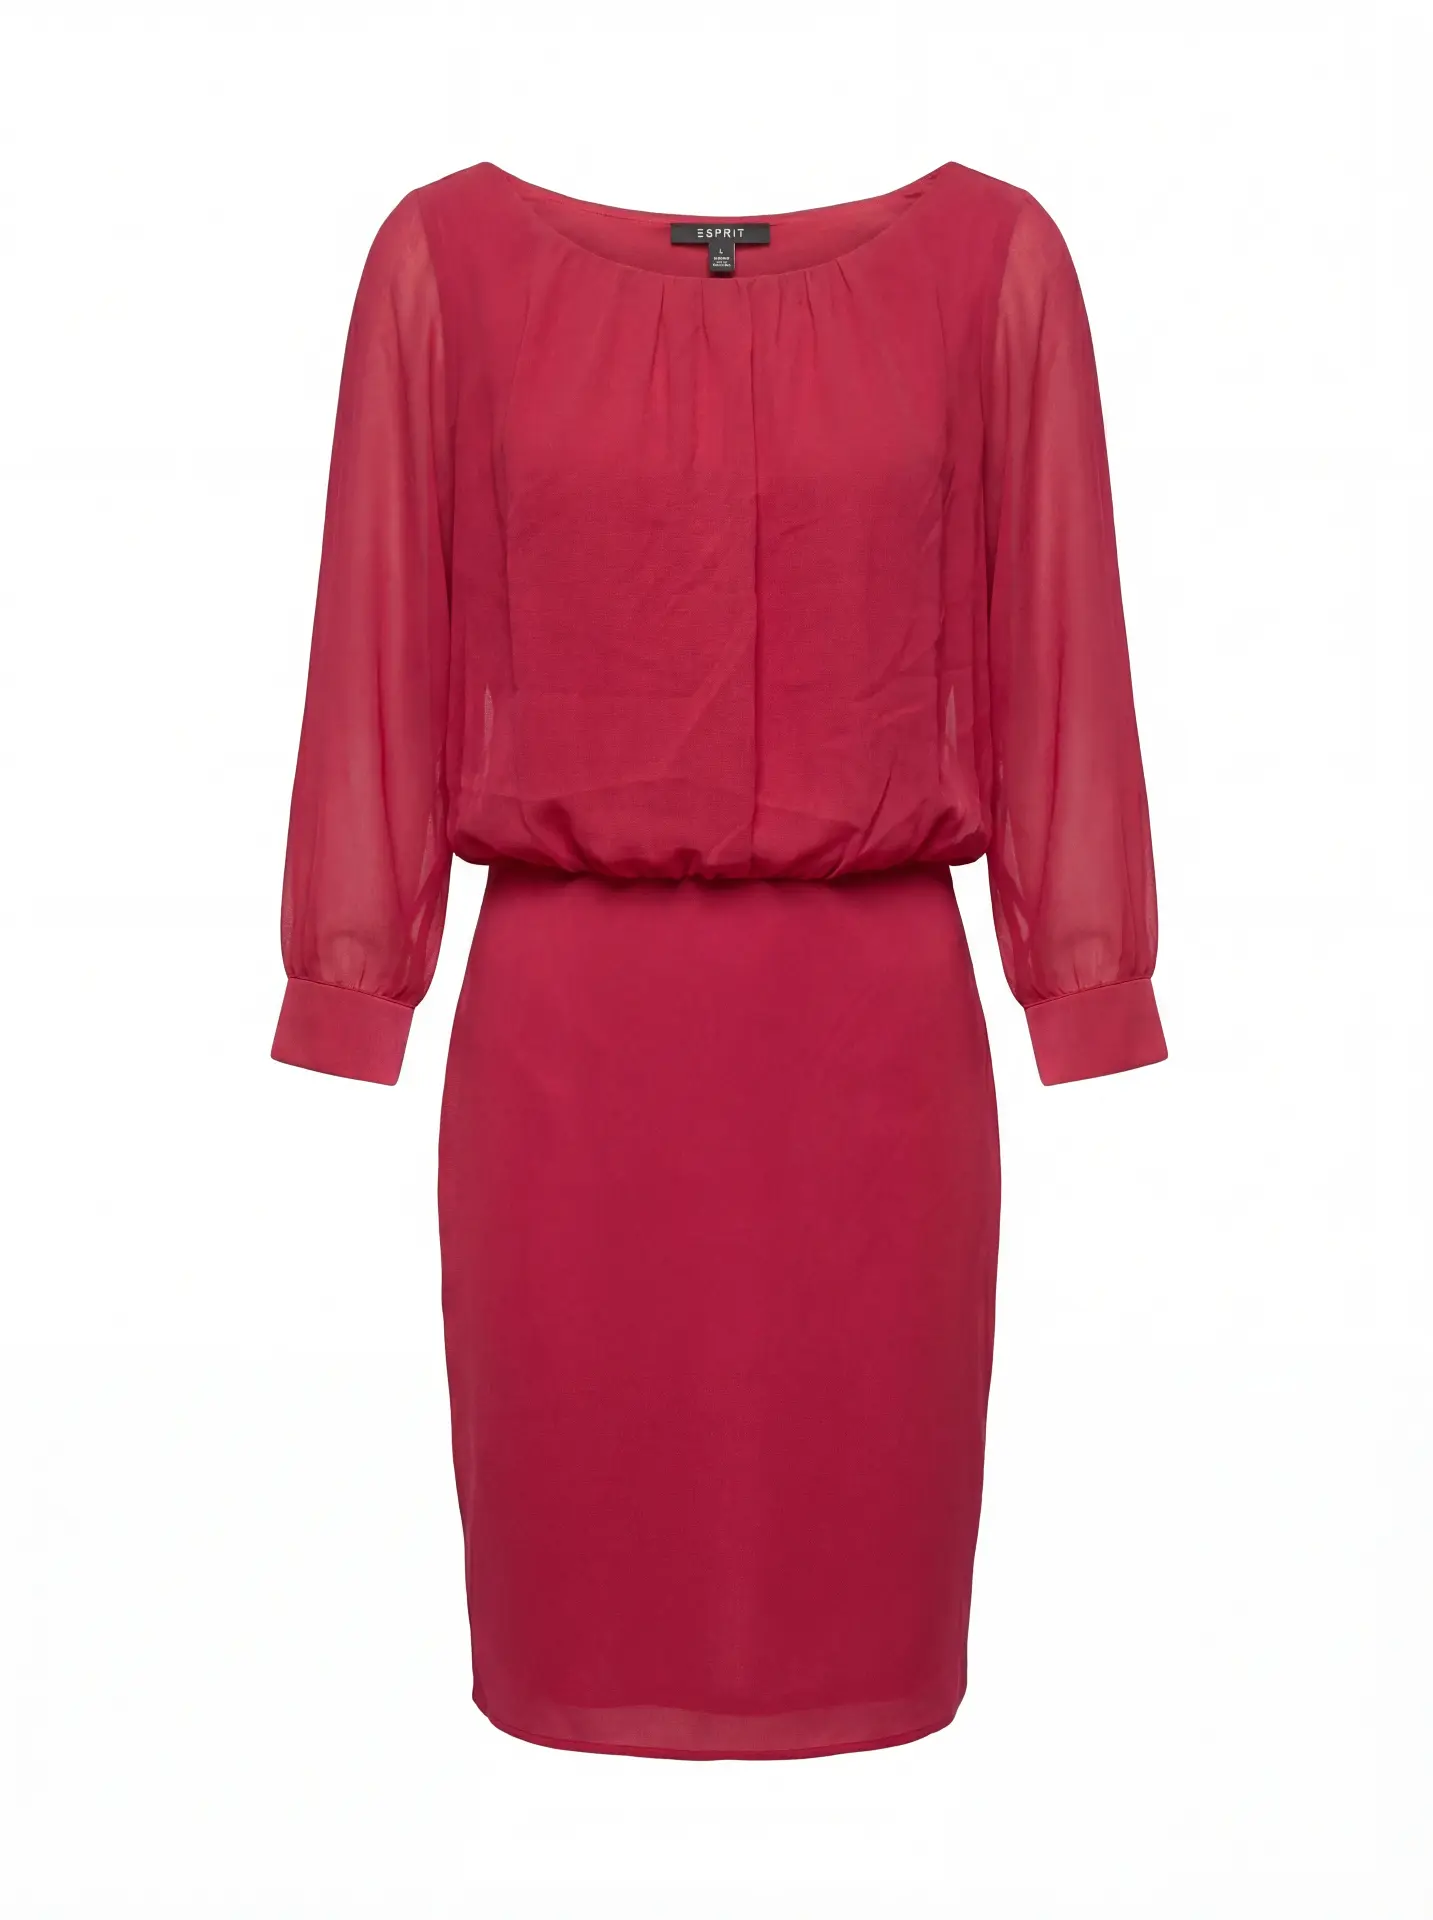
Unlike traditional mannequin photography where the form remains visible, the invisible ghost mannequin method creates a hollow, three-dimensional effect that allows customers to envision themselves wearing the product. This approach has become the gold standard for professional e-commerce platforms because it combines the dimensional benefits of on-model photography with the consistency and cost-effectiveness of studio shooting.
The technique is particularly valuable for showcasing shirts, dresses, jackets, hoodies, and other structured garments where shape and fit are critical purchase factors. By removing the mannequin through careful image editing and post-production, you create product photos that appear suspended in space, highlighting every seam, texture, and design detail without visual distractions.
Why Professional Ghost Mannequin Product Photography Matters
For fashion e-commerce businesses, product images serve as the primary—and often only—opportunity to communicate quality, fit, and value to potential customers. Research consistently shows that high-quality product photography directly impacts conversion rates, with professional ghost mannequin images outperforming flat lays by significant margins.
The invisible mannequin approach offers several distinct advantages over alternative photography methods:
Dimensional Clarity: Unlike flat lay photography, ghost mannequin product images show how garments actually look when worn. Customers can see the chest width, shoulder slope, sleeve length, and overall silhouette—critical information for online apparel purchases where try-ons aren't possible.
Consistency Across Catalogs: When shooting hundreds or thousands of SKUs, maintaining visual consistency becomes paramount. The ghost mannequin technique provides standardized positioning, lighting, and presentation across your entire product line, creating a cohesive brand aesthetic that builds customer trust.
Cost Efficiency at Scale: While professional model photography delivers aspirational imagery, the costs quickly become prohibitive for large catalogs. Mannequin photography offers a middle ground—more engaging than flat lays, more affordable than models, and infinitely scalable.
Focus on the Garment: By removing the mannequin and eliminating the distraction of a visible form or human model, the invisible ghost mannequin technique keeps 100% of visual attention on the product itself. Every stitch, fabric texture, and design element takes center stage.
Essential Equipment for Ghost Mannequin Photography
Professional ghost mannequin product photography requires more than just a camera and form. To achieve the seamless, high-quality results that e-commerce platforms demand, you'll need:
Photography Equipment: A DSLR or mirrorless camera with manual controls, ideally 24+ megapixels for adequate resolution. Pair this with a 50mm or 85mm lens for minimal distortion. Shoot tethered to a computer whenever possible to catch issues immediately.
Lighting Setup: Consistent, even lighting is non-negotiable. A minimum three-light setup (two main lights at 45-degree angles, one backlight) prevents harsh shadows and ensures accurate color reproduction. Softboxes or octaboxes create the diffused light quality necessary for fabric detail. For color-critical work, maintain ΔE values under 2 for marketplace compliance.
Mannequin Selection: Invest in professional photography mannequins specifically designed for the ghost mannequin technique. These forms feature removable sections (torso backs, neck pieces) that simplify the post-production process. Ghost mannequin-specific forms are available in various sizes to accommodate different garment cuts.
Background and Support: Use seamless paper or fabric backgrounds in neutral colors—pure white (#FFFFFF) is standard for most e-commerce platforms. Ensure your mannequin stand is sturdy and allows for easy positioning adjustments.
The Ghost Mannequin Technique: Step-by-Step Guide
Creating professional invisible mannequin images involves both careful photography technique and skilled image editing. Here's the complete workflow:
Phase 1: Preparation and Styling
Before the first shutter click, proper garment preparation ensures better results and faster post-production. Steam or iron every piece to remove wrinkles and creases. Position the apparel on the mannequin naturally, ensuring proper fit without excessive pinning or clipping (anything that creates unnatural tension will show in the final product photo).
For the ghost mannequin effect to work properly, you'll need to shoot multiple exposures of each garment. First, photograph the front with the mannequin fully assembled. Then, remove the mannequin's torso back (or relevant sections) and photograph the interior, capturing the inner neckline, labels, and inside construction. This "inside-out" shot provides the hollow effect that defines the technique.
Phase 2: Photography Execution
Position your mannequin at the center of your shooting space, maintaining consistent distance and angle for every garment. This consistency is crucial—even minor variations in camera height or angle will create visual discontinuity across your product catalog.
Set your camera to manual mode for complete control. Start with ISO 100-200 to minimize noise, then adjust shutter speed and aperture to achieve proper exposure. An aperture of f/8 to f/11 provides adequate depth of field for most garments while maintaining sharpness throughout. White balance should be set precisely—use a gray card for accuracy rather than relying on auto white balance.
Shoot in RAW format to preserve maximum image data for post-production adjustments. Capture the front view with the mannequin fully assembled, ensuring the garment is properly lit with no harsh shadows. Then remove the back panel (or relevant mannequin section) and shoot the interior view, matching the angle and positioning as closely as possible to the front shot.
For complex garments like jackets or structured dresses, you may need additional shots: sleeves at different angles, collar details, or side profiles. These supplementary images can be incorporated during the retouch phase.
Phase 3: Image Editing and Post-Production
The post-production workflow transforms your mannequin photography into polished invisible ghost mannequin product images. This process requires precision and attention to detail.
Import and Selection: Begin by importing your RAW files into your preferred editing software. Most professionals use Photoshop for ghost mannequin work due to its advanced masking and compositing tools. Organize your files by garment, pairing front shots with corresponding interior images.
Background Removal: The first critical step is removing the mannequin from your product image. Create a precise selection around the garment using Photoshop's pen tool for maximum accuracy. Feather the selection slightly (0.5-1 pixel) to prevent harsh edges. Delete the background, replacing it with pure white or your target background color.
Creating the Ghost Effect: Open both the front image and the interior shot. Use the pen tool to select the interior portion (neckline, inner construction), then copy and paste this selection onto your front image. Align the layers carefully—the interior section should nest seamlessly within the garment outline. Use layer masks and adjustment brushes to blend the edges where front and back meet.
This is where the invisible mannequin technique truly comes alive. When executed properly, the garment appears three-dimensional and hollow simultaneously, as if worn by an invisible form. The viewer's eye can follow the complete silhouette while also seeing through to the interior construction.
Refinement and Quality Control: With the basic ghost mannequin effect established, refine the details. Remove any remaining mannequin artifacts, clipping tools, or pins. Smooth any irregular edges using the clone stamp or healing brush. Adjust color balance to ensure accurate fabric representation—this is critical for reducing returns.
Check shadow consistency. If your garment casts shadows on the background, ensure they're subtle and natural-looking. For pure white backgrounds, consider removing shadows entirely or rendering them as subtle, soft gradients.
Perform final quality checks against your e-commerce platform's requirements: resolution (typically 2048x2048 pixels minimum), file format (JPEG for most platforms), color profile (sRGB for web), and file size (under 1MB in most cases without sacrificing quality).
Advanced Ghost Mannequin Techniques for Professional Results
As you master the fundamental ghost mannequin product photography workflow, several advanced techniques can elevate your results:
Multi-Angle Compositing: For complex garments, capture and composite multiple angles. This might include separate shots for sleeves, collars, or asymmetric design elements. Layer these components carefully, maintaining consistent lighting and perspective.
Garment Detail Preservation: During the image editing process, protect fabric texture and detail. Avoid over-smoothing or excessive retouching that makes apparel look artificial. Real customers want to see authentic material representation—nubby knits should look nubby, smooth silks should appear lustrous.
Color Accuracy Protocols: Implement color calibration workflows using color checkers during photography. In post-production, create and save color profiles for each fabric type you shoot. This ensures that your navy blue consistently reproduces as navy blue across your entire catalog, reducing customer confusion and returns.
Automated Workflow Integration: For high-volume e-commerce operations, investigate AI-assisted tools that can accelerate aspects of the ghost mannequin technique. Modern image editing platforms increasingly offer automated background removal, though human oversight remains essential for quality control.
Common Challenges in Ghost Mannequin Photography and Solutions
Even experienced photographers encounter challenges when executing the invisible mannequin technique. Here are solutions to frequent issues:
Alignment Difficulties: When the interior shot doesn't perfectly align with the front image, use Photoshop's transform tools (warp, scale, rotate) to adjust the interior layer. Work at high magnification to ensure seams and edges line up precisely.
Visible Mannequin Artifacts: If mannequin edges or sections remain visible after removal, use clone stamp and healing brush tools to seamlessly blend them away. Source texture from adjacent garment areas for the most natural results.
Inconsistent Lighting: When front and interior shots have different lighting characteristics, use adjustment layers (curves, levels, color balance) to match them before compositing. This prevents obvious visual discontinuities.
Wrinkles and Fabric Issues: Address major wrinkles through proper steaming before photography. Minor creases can be minimized in Photoshop using the healing brush, but avoid excessive retouching that makes the garment look unnatural or plasticky.
Optimizing Ghost Mannequin Images for E-Commerce Platforms
Different e-commerce platforms have specific requirements for product photography. Understanding these standards ensures your ghost mannequin product images perform optimally:
Amazon: Requires pure white backgrounds (RGB 255, 255, 255) for main product images. Images must be at least 1000 pixels on the longest side. The product should fill 85% or more of the frame. Follow these specifications precisely—non-compliant images may be rejected or suppressed in search results.
Shopify: More flexible than Amazon but recommends square images (1:1 aspect ratio) at 2048x2048 pixels. Supports transparent backgrounds as well as white. Ensure fast loading times by optimizing file sizes without sacrificing quality.
Your Own E-Commerce Site: Maintain consistency across your catalog while optimizing for page load speed. Consider creating multiple versions: high-resolution master files for archives, medium-resolution images for product pages, and thumbnail versions for category pages.
The Future of Ghost Mannequin Product Photography
The invisible ghost mannequin technique continues evolving with technological advancement. AI-powered tools are beginning to automate portions of the workflow—from initial background removal to sophisticated compositing tasks. However, the fundamentals of proper lighting, styling, and photography technique remain irreplaceable.
Professional fashion e-commerce businesses should view ghost mannequin photography as an investment in conversion rate optimization. Quality product images directly impact purchase decisions, reduce return rates (by accurately representing garment fit and appearance), and build brand credibility.
As marketplace competition intensifies, the quality bar continues rising. Customers increasingly expect professional, detailed product photography across all price points. The ghost mannequin technique offers an efficient, scalable method for meeting these expectations while maintaining the visual focus squarely on your apparel.
FAQ: Ghost Mannequin Photography
Product Photography Questions
What is the ghost mannequin technique? The ghost mannequin technique (also called invisible mannequin or 隐形人台) is a product photography method that creates a hollow, three-dimensional effect by photographing clothing on a mannequin, then digitally removing the form in post-production. The result shows garments as if worn by an invisible body, displaying shape and fit without visual distractions.
How much does ghost mannequin photography cost? Professional studio rates range from $15-50 per image depending on garment complexity and volume. In-house costs include equipment ($2,000-10,000), labor, and ongoing editing expenses. AI-powered platforms like Photostudio offer per-image pricing starting under $1, making professional results accessible at any scale.
How to create a ghost mannequin?
- Photograph the garment on a mannequin (front view)
- Remove mannequin sections and photograph the interior
- Use Photoshop to remove backgrounds and composite both shots
- Blend the interior layer into the front image to create the hollow effect
- Retouch and refine edges for seamless results
What is the difference between flat lay and ghost mannequin? Flat lay photography shoots garments laid flat on a surface, showing only two dimensions. Ghost mannequin displays clothing in three dimensions as if worn, revealing fit, drape, and silhouette—providing customers better understanding of how the garment actually looks when worn.
How to take ghost mannequin photos? Use a photography mannequin with removable sections, proper lighting (3-point setup minimum), and a neutral background. Shoot the front with the mannequin assembled, then remove back sections and photograph the interior. Maintain consistent camera position and settings between shots for easier compositing.
How to edit ghost mannequin? In Photoshop: remove the background using pen tool selections, align and composite the interior shot with the front image using layer masks, blend edges seamlessly, remove any visible mannequin artifacts, and adjust colors to match your e-commerce platform requirements.
How to do ghost mannequin photography? Combine proper photography technique (consistent lighting, positioning, and exposure) with skilled post-production editing. Shoot multiple angles of each garment, remove backgrounds, composite interior and exterior shots, and retouch to create the final invisible mannequin effect.
Conclusion: Mastering the Invisible Mannequin Technique
Ghost mannequin product photography represents the intersection of technical skill, artistic sensibility, and commercial pragmatism. By removing the mannequin while preserving garment dimension and shape, you create product photos that inform, engage, and convert.
Whether you're building an e-commerce empire or optimizing an existing catalog, investing time in mastering the ghost mannequin effect pays dividends. The technique delivers professional results at scale, maintaining consistency across thousands of SKUs while showcasing each garment's unique characteristics.
Start with the fundamentals: proper lighting, precise photography technique, and careful image editing. As you develop proficiency, explore advanced compositing methods and workflow optimizations. With practice, you'll produce invisible ghost mannequin images that rival those from dedicated product photography studios—at a fraction of the cost and with complete creative control over your brand's visual presentation.
The ghost mannequin technique isn't just a post-production trick; it's a comprehensive approach to professional clothing photography that elevates your entire e-commerce operation. Master it, and watch your product images—and conversion rates—transform.
Transform Your Product Photography with Photostudio
While mastering the ghost mannequin technique in-house requires significant investment in equipment, expertise, and time, Photostudio offers a revolutionary alternative. Our AI-powered platform transforms fashion product photography from a complex, multi-step process into a streamlined workflow that delivers professional results in minutes. Simply upload a single snapshot taken with your smartphone—even with a visible mannequin, wrinkled fabric, or inconsistent lighting—and our advanced AI handles everything else. We automatically remove backgrounds, create the invisible ghost mannequin effect, correct colors to marketplace standards, and generate a complete suite of fashion visuals: ghost mannequin shots, flatlays, background swaps, professional relighting, and even on-model composites. What traditionally required a professional studio, skilled photographers, and hours of Photoshop work now happens automatically, maintaining the consistency, quality, and dimensional accuracy that e-commerce platforms demand. Whether you're launching a new brand with limited resources or scaling an established catalog with thousands of SKUs, Photostudio democratizes professional fashion photography—delivering studio-quality ghost mannequin product images without the studio-level investment. Focus on designing great apparel; let us handle the imagery that sells it.
Ready to Transform Your Product Photography?
Start creating professional ghost mannequin images with AI-powered automation
Get Started Free